It is an awesome hands-on world history unit study which is suitable for children in grades 3-8, but you can easily adapt the activities for lower grade levels to be involved in the process. The unit study will take you approximately 8-12 weeks to complete without additional rabbit trail detours.

Topics Addressed (400 AD to 1500 AD)
- Barbarian Invasions, Groups, and Territories
- Crime, Punishment, and Entertainment
- Battles, Wars and Conflicts: Weaponry, Muslim Invasions, Eastern Europe, and England
- Viking Life and Era
- Merchants, Trade, and Exploration
- Crusades and Famous People
- The Feudal System: Structure of Classes
- Medieval Culture and Everyday Life: Clothing, Food, Family, and Community
- Villages and Castles
- Towns and Guilds
- Knights and Chivalry
- Education
- Science and Invention
- Medicine: Nasty Diseases and Black Death
- The Arts
- Church History: Pilgrimages, Tales, Religious Events, Rise of Islam, and Monastic Life
- Relevant People
I used Project Passport World History Study: The Middle Ages with Alyssa (Age 7 1/2) who works at a 3rd-5th grade level. We took a break from our world history curriculum to try something new and to give us a break from the routine schedule. Home School in the Woods was utilized as a standalone world history summer curriculum.
My goal was to complete one stop each day working at least 3-5 times per week. However, I quickly realized some projects required much more time. The schedule is extremely flexible allowing you to choose how many projects and stops you want to complete in a given amount of time. We basically completed as many stops and projects as desired during each sitting and stretched out the project over several days if necessary. I wanted her to enjoy the study, not feel rushed, and retain the information better so we slowed things down a bit.
First, I downloaded and opened the digital file on my MAC computer using Safari as my browser. Adobe Reader is needed to open PDF files. My initial reaction when I first opened the file was that I felt a bit overwhelmed. I immediately started printing without reading anything, because I was anxious to begin, but I quickly realized that I should have read the directions. There was an "Important! Please Read First" note! After reading this note, I noticed specific printing directions for each project. The file indicated which type of paper to use. It also stated whether the paper should be colored or white. This information was extremely helpful. The more I explored the contents of the file and became more familiar with the material, the overwhelming feeling disappeared.
It was time to organize our binders. Two cover choices were available: Color and black and white. I asked Alyssa to color the black and white cover of her binder. The student binder holds all of her completed projects. I printed the black and white version for my teacher binder to save on ink cost and chose not to color it. Then, I hole punched the reading texts and placed them in the teacher binder in numerical order.

I read the Introduction section which contained printing tips and other helpful information about the organization of the study. My intention was to print as we worked through the unit study. However, my plans changed. It was easier to print items in batches or groups. I ended up printing out all the timeline pages, 3 pages of timeline figures, 2 newspaper pages, 2 postcard sets, and the components for several stops at a time.
I skimmed over the Travel Tips which explained the format of the lessons and indicated which supplies were needed on hand. There was a moderate amount of prep required prior to beginning the unit. This section also included a list of icons seen on the Travel Itinerary which represent the type of project to be completed.
I kept the 3-page Travel Planner or Quick Stop Itinerary at the front of my binder. The icons appeared at the bottom of each page as a reference. This Travel Planner gives you an overall glance of all the lessons enabling you to plan ahead.
 |
Travel Planner Quick Stop Itinerary
Stops 9-16
|
There is also a Travel Itinerary which describes the projects with detailed directions for each stop and the materials required. Household items were frequently used. I also added the "Travel Itineraries" and teacher helps to my binder.
Each stop began with a fact-filled read aloud "Guide Book Text" which focused on a specific topic. It discussed the background history and culture, historical dates, information about relevant people, and significant events in history. Some stops required additional research. We took turns reading the material in the Guide Book so that I could keep her attention and encourage participation.
 |
Stop 6: Everyday Life Part 3
Life in a Castle, Village, and Town
|
The "Additional Resources" list was placed at the back of the binder. I highlighted the titles of books available at my library.
 |
| Additional Resources |
I started gathering supplies as soon as I found out I was going to be reviewing this product. It would be helpful if you had the following list of items on hand prior to beginning the study.
- Two 3-Ring Binders with Clear Vinyl Front for Cover (2" and larger)
- Colored and Black Ink
- White and Colored Cardstock
- White and Colored Paper
- Colored File Folder with Pocket
- Easel Knife and Cutting Surface (Self-Healing Mat)
- Scissors, Glue Stick, Liquid Glue, Double-Sided Tape
- Writing Tools and Colored Pencils
- Pencil Sharpener
- Ruler and Paper Clip (optional for Scoring Thick paper)
Ongoing Projects
Let's take a look at the ongoing projects. Several projects continued throughout the entire unit study such as the Snapshot Moments in History Timeline, the Medieval Times Newspaper, and the Postcards.
The "Snapshot Moments in History Timeline" gave Alyssa a visual record of the historical events that occurred during the time period. She decided not to color the images so that we could clearly see the details. The graphic with the caption was cut and glued down in the appropriate area of the timeline. Alyssa checked her work using the teacher key of the timeline which was viewed on the computer. This made placement easier.

In the screenshot below, you can see a few articles Alyssa wrote and illustrations she drew. All of the Medieval Times Newspaper articles will be eventually be assembled together to form a newspaper.
 |
| Newspaper Articles |

Audio Tours
We listened to three of the seven dramatized short audio tours led by Agatha, the tour guide, including "Interview Among the Classes," "Visiting a Village, Town, and Castle," and "Trade Festival on the Holy Day." The informative audios really helped Alyssa and I understand what life was like during the Medieval Times and they brought history to life. They contained useful and relevant information that made the study more meaningful. The audio tour also helped Alyssa retain the information better. She listened to the audio tours while working on projects. The audio tours were played several times for repetitive listening. Alyssa was given a choice as to which ones she wanted to hear each day.
Luggage Folder, Passport, and Postcard Rack
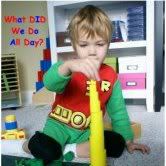
The unit is based around a vacation or trip theme. We created a luggage folder and a passport. Alyssa chose a purple pocketed folder and pink yarn for the tie. I did the easel knife cutting for safety reasons, because folder was thick and difficult to cut. Alyssa was surprised when she saw the end results of the project. The rest will be filled out at a later time.

She was fascinated with the idea of the passport. We discussed the purpose of a passport. I found and printed an up close image for her to cut out. Below is a picture of her creating her passport.

 |
Passport Completed
|
 |
| Postcard Rack and Postcard (Front) |
 |
"Wish You Were Here" Postcard Greeting
Alyssa created her postcard greeting. The front side reveals a friendly letter from a famous historical figure (King Genseric) written and directed to his fellow countrymen also known as the Vandal People. I think this activity is a great way to help children see the different perspectives of individuals from history. The front of this postcard can be seen in collage pictures above.
 |
| Postcard Back Colored and Not Colored |
Mapping the Barbarian Invasions
Two maps were provided. Alyssa used the teacher keys to copy the maps. Red lines divided the regions on the teacher map. She chose not to color the regions.

Stop 4: Family
Structure of Classes Notebooking and Lapbooking Projects
Alyssa learned about the feudal system which is the structure of the classes during the Medieval Times. She cut out the images and descriptions. She glued the images on top of the descriptions and then folded them over. Next, she glued those mini books on the pyramid. The pyramid lines were shaded light gray which offered assistance with placement.
 |
| The Feudal System |
 |
| Structure of Classes Lapbook |
Puppets, Cooking, and Crafts Oh My!
We read information about the clothing worn by specific classes. Alyssa also learned about the Sumptuary Laws. She couldn't believe that people were fined and even punished for dressing above their class. We added the notebooking pages to her binder. She wanted to color the puppets instead of the pages. We used popsicle sticks instead of skewers for the handles. She colored the characters over several days coloring 3-5 puppets per day. Alyssa reread the clothing information before coloring the puppets. She created a little "King and Queen" romantic skit and played with them behind her puppet theater.
 |
| Puppet Characters and Clothing |
One of our favorite mother-daughter activities is to work in the kitchen together. The Booklet of Medieval Cookry (lapbook piece) included a table of contents menu, a short historical description for each listed recipe, a list of ingredients for each dish, and step-by-step simplified directions. We went to the store to purchase missing ingredients.

Alyssa did most of the cutting, measuring, mixing, kneading, and so forth while I supervised. Our favorite recipes to make were the Beef and Barley Soup and the Herb Bread. The Herb Bread is absolutely delicious! Alyssa enjoyed punching the air out of the dough after rising. We liked it so much that we made two extra loaves with the soup so that we could freeze the leftovers.
 | ||
Making the Bread
|

 |
| Tasting the Bread and Soup Prep |
 |
Beef Barley Soup
|
We made a chicken and rice meal called "Blawmanger." We added cinnamon and dried fruit. It was a plain meal with a hint of sweetness and almonds.
 |
| Also Known as Blankmanger |

 |
| Flower Wreath Circlet |
 |
| My Beautiful Baby Girl |
 |
| Doesn't this look like fun? |
Stop 5 was our favorite all-time stop! The fun-filled adventures engaged our full attention and interest. The memories will be cherished forever.
Stop 6: Community
Castle Life
We did not get to create the sugar cube castle, but we want to in the near future. Alyssa colored in the castle picture below. This project is incomplete. She will actually glue numbered room descriptions on clear acetate. This will enable the child to view the rooms and their purpose within a castle. An information sheet describing the rooms of the castle was provided.
 |
| Castle Project |
 |
| Life in a Castle Lapbook |
"Life in a Castle" is a research notebooking activity. My daughter utilized the Internet, library books, and the Guide Book to fill out the page. She assembled the lapbook piece. There are several other similar projects in this series.
Jousting, Fox and Geese Game, and Justinian Code Booklet
I cut the slits for the figurines. Alyssa colored and cut everything else. She had to be very careful when poking a hole for the brad because the lance was thin. The lances and characters can be moved for active jousting play.

I am not sure we played this game correctly. The geese could never pen in the fox! There's a possibility that we misunderstood the directions.
 |
| Fox and Geese Game |
My daughter created a mini book replica of the Justinian Code created by Byzantium emperor, Justinian I. It's a collection and reorganization of old and new laws which were divided into four main parts.

Stop 8: Towns and Guilds
Life in a Town
This activity consists of mini blurb books glued around the castle. She quickly learned information about each topic. A description discussing the importance of the Medieval Town is on the back side. It was three-hole punched and placed in her binder.


Stop 9: Merchants, Trade, Explorations
Merchant Trade Good Booklet and Occupation Game
The trade goods booklet is incomplete. We need magazine pictures of goods for the inside flap. You can always have your child draw and color the images. She chose six origin areas for her booklet. We printed a list of various trade good items and their country origins. She also learned about the Hanseatic League alliance which offered protection from thieves and promoted commerce.

We enjoyed playing the Occupations Concentration game! The green sheet lists the jobs and their descriptions. We used it as a reference during the game in the very beginning until we became more familiarized with the descriptions. We learned the occupations quicker without any added pressure. I split the cards into two smaller sets. We played two games which made it easier to learn the occupations, because there were fewer cards.
 |
| Occupations Concentration Game |
What We LOVED
- Flexible Scheduling Options
- Abundant Selection of Hands-On Projects
- Integration of Other Subjects Such As Reading, Writing, Art, and History
- History is Memorable and Fun with Added Games, Crafts, and Recipes
- Finished Project Photos are Included
- Background Informational Text Provided
- Clearly Stated Numerical Instructions with Bulleted Supply or Ingredient List

- Comprehensive and Complete for Its Purpose
- Easily Adaptable to All Ages
- Instantly Accessible and Available as a Digital Download
- Detailed Handdrawn Images
- Project Materials Easily Found Around the House
- Interesting Fact-Filled Audio MP3's
- A List of Additional Resources Including Books, Audio Books, and Movies is Available
 |
| Family Movie Night Quest for Camelot is Another Good Movie to Add to the List! |
 |
| Literature Selections |
- Larger lines and spacing for younger writers
- Beautiful images but younger learners may have a difficult time coloring them
- The timeline figure topics weren't always related to the information covered. I also felt like we were jumping around at times.
- Create leveled, differentiated maps for children who may not be able to label the entire map.
- The "Fox and Geese" game directions may need clarification.
There are two formats or versions available for purchase.
- You can purchase the digital download for $33.95.
- The CD will cost you $34.95.
Recommendations
I would definitely, without a doubt, HIGHLY recommend Project Passport World History Study: The Middle Ages to homeschool families searching for a hands-on approach to studying world history. If your children are hands-on learners or enjoy projects, notebooking and lapbooking then you should consider purchasing this product if the topic is of interest. My daughter just couldn't get enough of it and always wanted to start the day with it. It can supplement any world history curricula.
Other Products in the Series
Project Passport World History Study: Ancient Egypt
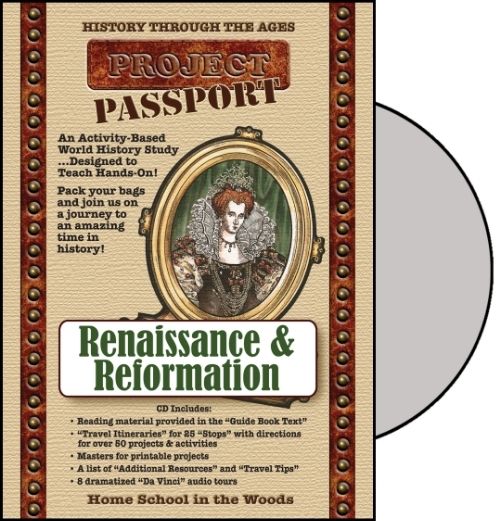
Project Passport World History Study: Renaissance and Reformation

Social Media
Twitter @HSintheWoods
Google+
You Tube
The Schoolhouse Review Crew blog more Project Passport reviews from Home School in the Woods covering the Middle Ages, Ancient Egypt, and the Renaissance and Reformation time periods. Head on over to read those reviews now before you forget.


What a great review, love all the pictures. Looks like you all had a lot of fun with a trip to the Middle Ages!
ReplyDelete