We had the privilege to review
Exploring Creation with Human Anatomy and Physiology published by
Apologia. This curriculum is part of the Young Explorer Series. This particular book title is written by Jeannie Fulbright and Brooke Ryan, M.D. The curriculum teaches the human body for elementary grades. It is suitable for children ages 6 to 13 and is intended for those who are in K-6th grade. The textbook can be utilized with the entire family. The curriculum is adaptable and can be modified for multiple ages and grade levels. Apologia is a well-known homeschool Christian company and their books are unique in that they offer a Christian-Worldview about a specific topic. There are many text references to God, our Creator. I've used Apologia's curriculum in the past and it has become the elementary Science curriculum I turn to. We reviewed
Exploring Creation with Chemistry and Physics several years ago.
What We Received
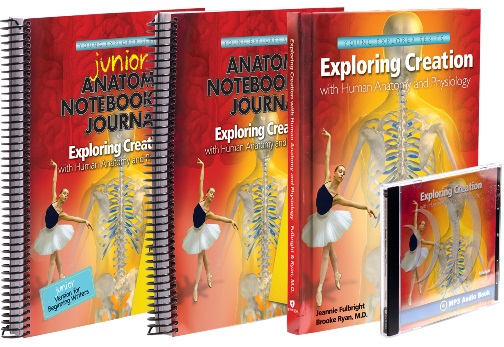
We received physical copies of the following items to review by mail:
- Exploring Creation with Human Anatomy and Physiology Text $42
- Exploring Creation with Human Anatomy and Physiology Junior Notebooking Journal $29
- Exploring Creation with Human Anatomy and Physiology Notebooking Journal $29
- Exploring Creation with Human Anatomy and Physiology MP3 Audio CD $29
These items are available to purchase individually through their online store. You can choose which materials will work best for your family. We're using them all!
Note: All prices are subject to change without notice.
How We Used It
I used this curriculum with Alyssa (Age 10) who is in 4th grade as her core Science curriculum. I wanted to add in more hands-on Science activities to our day. You can work sequentially in order or possibly jump around. We chose to work through the lessons in sequential order. The Regular Notebooking Journal was the main journal we used for the purposes of this review. However, I assigned the coloring pages, labeling exercises, vocabulary activities, and the occasional vocabulary crossword puzzle from the Junior Notebooking Journal as supplemental work. The Junior Notebooking Journal included an easier vocabulary crossword puzzle in which the first letter of every vocabulary word was given.
 |
| Regular Notebooking Journal |
Science lessons lasted approximately 45 minutes to 1 1/2 hours. We didn't need to add any other supplementary materials to the day's work load. I used the Suggested Daily Schedule as a guide. It suggests that you work on Science twice a week. This means there are 28 weeks worth of lessons with each lesson lasting two-weeks long. You have an entire year's worth of lesson materials. I decided to split the lessons up into smaller chunks so that we were doing Science each day.
I implemented a pick-n-choose, relaxed approach when deciding on daily assignments. However, I reminded myself that I needed to balance out the Writing intensive components in order to limit the amount of Writing assigned in one day. We worked on Science 4-5 times a week.
The day usually began with reading and narrations. We took turns reading paragraphs or sections aloud. At the beginning of the week, I would assign coloring pages, manuscript Scripture copywork, and 1-2 fascinating facts. Alyssa completed the notebooking pages independently. Try This! activities that were related to the reading segment were usually completed when indicated in the book. Then, we'd add in the other randomly assigned pages from both of the notebooking journal activities throughout the week. There really wasn't any rhyme or reason as to when certain pages were done or how many. Alyssa always re-read the textbook pages while filling out her notebooking page responses. Thursdays and Fridays were reserved for experiments and an occasional Try This! activity.

Every other week, the fifth day served as a make-up day which enabled us to catch up. We occasionally used that day to jump ahead in our studies or wander off on rabbit trails. I loved the flexibility of the curriculum! I highlighted each completed assignment in yellow on the suggested daily schedule in order to track our progress through the curriculum.
We gathered materials needed for Try This! activities, projects, and experiments in advance. The supplies were stored in Ziplock bags and labeled with the corresponding lesson number. All bags were placed in a lidded storage tub with the online supply list.
Product Descriptions
Textbook
The 265-page brightly colored hardcover textbook can be used year after year. It is written directly to the student in an engaging, conversational tone. The curriculum is organized into 14 lessons which are jam-packed with detailed diagrams, colorful illustrations, and vivid photographs.

It begins with a Scientific-Speculation Sheet and the Table of Contents which highlights each lesson in blue. There is also an Introduction to the book which explains each activity component of the course including a paragraph about the Lesson Increments, Narration, Notebooking Activities, Personal Person Project, Projects & Experiments, and a Course Website. A website address is provided on page 13 of the textbook and a password is given where you can access Book Extras that correlate with the course. Once logged in and you've added the course, then you'll find additional educational links, games, videos, and helpful printables related to the lesson content. This is a wonderful resource that will extend and enrich your study.
A step-by-step guide or overview on How To Use This Book follows. It includes numbered steps enabling you to make the most out of the course. The book also contains a handy list of items that are needed to complete each lesson. You are encouraged to gather supplies first. It is organized by lesson and items are bulleted making it easy to read.
The informative reading topics are organized by a larger bold purple print. These subject titles served as great natural stopping points for narrations. Alyssa narrated what she learned for each topic as we read together. Relevant vocabulary words were in bold print.
Lesson Topics Covered:
- Introduction to Anatomy and Physiology
- Skeletal System
- Muscular System
- Digestive and Renal System
- Health and Nutrition
- Respiratory System
- Life in the Blood
- Cardiovascular System
- Nervous and Endocrine System
- Nervous System Extended
- Your Senses
- Integumentary System
- Lymphatic and Immune System
- Growth and Development
The book ends with an Index and Resource Credits.
Let me tell you about each of the textbook components. Some correspond with and can be used in conjunction with the Notebooking Journals.
Creation Confirmation Booklet
This mini-book is a great place to indicate and record those references to God, Biblical truths, and His creations. As you study anatomy and physiology, many references will be made towards God. Alyssa jotted down important points in this booklet when necessary
Verbal Narration Prompts
Narration prompts were scattered throughout the lesson in the textbook. For example, the following narration prompt was stated in Lesson 2 of the Skeletal System:
Take some time to tell someone what you learned about bone growth, remodeling, and healing. Alyssa was later asked,
"Before moving on, review the bones of the arms, hands, legs, feet, and girdles. Tell someone else what you have learned." Lesson 3 of the Muscular System prompts the child to
"Explain in your own words what you have learned about muscles so far." Narration prompts were seen in a blue font.
I decided to narrate more often than required in the textbook. I wanted my daughter to retain the information better so she verbally narrated
smaller chunks of information. I required Alyssa to narrate or "tell back" the material after
every bolded topic. These narrations weren't written down. They helped her stay focused and to be an active learner while improving her communication skills. It definitely helped her retain the information better. After her response, I would clarify any misunderstandings and summarize key points.
 |
| Narration Prompt |
Try This Activities
These are boxed mini-demonstrations that model relevant points throughout the book. These hands-on activities required very few supplies and minimal prep. They are best if used when indicated in the textbook, but you can wait until the end of a lesson or until after the day's reading if desired. Alyssa compared human figures she created out of clay with and without bones (toothpicks) in order to learn that the the skeletal system supports the body and enables it to stand up and move. We taped her fingers together so that she could learn why hand bones were important. In Lesson 3 she learned how smooth muscles push food through the intestines using a nylon sock and a clay ball. This was a bit tricky because the sticky clay kept getting stuck. Her favorite Try This! activities were found in Lesson 4 where she found out what acid does to teeth by observing the changes of the enamel on her baby tooth soaked in soda pop over time. She noticed that the soda stained the enamel and eventually small holes will form. She also watched amylase in her saliva break down starches into sugar when she observed the chemical digestion process of a cracker placed on the tip of her tongue. This lesson also included the stomach bag simulation which shows what happens when your stomach churns food. Furthermore, she measured the length of her small intestine using a yard stick and measuring tape. She loved testing the starch content of different foods using iodine in Lesson 5. She was fascinated by the chemical reaction of the iodine turning dark blue (almost black) when starch was present in a food. These activities really helped Alyssa understand the concepts being discussed in an age-appropriate manner.
 |
| Skeletal Clay Creation |
 |
Daily Activities:
Importance of Hand Bones |
 |
| Try This Activities |
 |
| Testing for Starch |
Projects or Experiments
Each lesson ended with a project or an experiment to complete such as creating an Edible Cell, Analyzing a Chicken Bone, Growing a Muscle, Designing a Digestion Theme Park, and Testing for Vitamin C. These activities helped Alyssa practice her observational and experimental skills. She learned the following basic steps of the Scientific Process when conducting a valid, reliable experiment: Listing Materials, Indicating the Procedure and Observing What Was Done, Writing a Hypothesis, Recording the Results, and Writing a Conclusion. Many projects included a bulleted supply list and step-by-step numbered directions to guide your child towards success. There are corresponding Notebooking Pages to record the experiment or project results.
Our first project was the Edible Cell creation. My daughter chose several different types of candy to represent the cell organelles. She cut chunks from the bottom to place the candy inside the jello cell after it set overnight. Then, she flipped it over. Of course the best part was eating it!
 |
| Edible Cell Project |
She also analyzed a chicken bone after it soaked in vinegar. The calcium was removed from the bone and the chicken bone became more flexible over time.
 |
| Mom the bone bends and is rubbery! |
Alyssa learned that if you use the same muscle over time it'll become stronger. She recorded the number of times she could open and close a clothespin in a minute every other day. Alyssa graphed her results over several days. She noticed her hand muscles were becoming stronger enabling her to open and close the clothespin more often.
 |
| Growing a Muscle Experiment |
What Do You Remember?
This section contains
oral discussion questions found at the end of each lesson as a review. Alyssa needed to recall important information learned from the lesson verbally. If you want your child to respond in written format there is a accompanying sheet in the
Regular Notebooking Journal to record their answers. The answers to the What Do You Remember Review Questions can be found at the back of the book. The answers are in bold, italic print. The questions are in plain type. Alyssa wasn't required to respond with exact answers. She explained the concepts in her own words. The author clearly states that these questions are meant to jog their memory.
 |
| Textbook Oral Discussion Prompts |
 |
What Do You Remember Notebooking Questions
with Textbook Answer Key |
Textbook Notebooking Activities
These notebooking activities correspond with those found in the journals so if you have one of the journals, it'll be easier and save a lot of time. You can create your own notebooking journal sheets if desired. I definitely appreciated having everything contained in one spot ready to go.
Personal Person Project
This is an ongoing, unique project to be completed as you read through the entire book. After learning about a system, you will add organs or systems you've studied to a personalized paper model found in your Notebooking Journal. I love that all of the templates were provided in the Appendix of the Notebooking Journals with several different skin tones. The transparent overlay templates are made of acetate or overhead projector material. Lesson 1 includes a bulleted supply list and numbered directions for creating the Personal Person Project. Instructions for adding pieces are provided at the end of each lesson.
It's Notebooking Talk Time!
Both journals have a suggested daily lesson plan schedule based on the components found in each version, fascinating fact notebooking pages, diagrams to label, vocabulary activities, creative writing assignments, mini-books, scripture copywork (manuscript and cursive), project pages, and scientific speculations sheets. These activities reinforce learning. The journals also provide a More to Explore page which is the same in each notebook. It lists DVD and literature suggestions, experiments, word studies, Bible studies, and more hands-on activities. Your child documents the information they're learning from the text into a journal that can be reviewed later. As I discuss each notebooking element, I'll note the differences between the two versions.
Junior Notebooking Journal
The 230-page consumable spiral-bound Junior Notebooking Journal is to be used by a single student. There are 65 additional pages in the Appendix. The Junior Notebooking Journal is different from the Regular Notebooking Journal in that it contains coloring pages and more hands-on, cut-n-paste vocabulary activities such as lift-the-flap booklets and puzzle match-ups with shapes that enable the student to self-check their work. Alyssa matched definitions to vocabulary words. The vocabulary activities are more simplified. There are two coloring pages per lesson. Your child can color as you read aloud the text. The Junior version also has larger dotted primary handwriting lines, the font is larger, and the length of the copywork passage is shortened. There are also fewer crossword puzzles with first letter aids to make it easier for younger children. This notebook is intended for children in K-2nd grade possibly even 3rd graders who are still developing or mastering writing skills. The answers to the vocabulary activities are found at the back of the journal.

 |
Manuscript Copywork Comparison
Junior Version on Left and Regular Version on the Right |
 |
Vocabulary Crossword Puzzle Comparison
Junior Version on Top and Regular Version on the Bottom |
 |
| A Variety of Junior Notebooking Vocabulary Activities |
 |
| Example of Primary Dotted Lines |
Notebooking Journal
The 202-page spiral-bound Regular Notebooking Journal is designed to be used with a single student. The Appendix consists of 44 pages. This consumable notebook version offers more advanced vocabulary Crossword Puzzles without first letter aids for each lesson. The crossword puzzle answers are found at the back of the notebook. The What Do You Remember review questions can only be found in the Regular Notebooking Journal. You'll also find that this version is more Writing intensive and offers more space to write. The lines are smaller, copywork passages are longer, and the font is smaller. This notebook version is more suitable for children in 3rd and 4th graders who have strong writing skills. Older children can also use this journal.
Vocabulary Crossword Puzzles
She practiced vocabulary terminology using crossword puzzles. Each puzzle provides a word bank and numbered across and down clues. The following is an example from Lesson 5.
Labeling Diagrams
Alyssa drew and labeled a cell during the first lesson. Then, she labeled the skeleton after learning about the skeletal system. These activities help improve vocabulary skills. She reviewed the functions of the organelles as she drew them. She also chanted and touched the bones seen on the diagram.
Scripture Copywork
Copywork verses are available in print and cursive format. Scripture Copywork was first done in manuscript format. Then, she wrote the same verses in cursive on a different day. Alyssa practiced and improved her penmanship skills as she completed her copywork activities.
Fascinating Facts
Alyssa wrote 1-2 fascinating facts after reading. She loves having the ability to chose the fascinating facts she thought were most interesting. Many facts are accompanied with a matching illustration. This helps to personalize the journal.
Creative Writing
Alyssa wrote a Muscle Times newspaper article in order to share meaningful facts she learned about the types of muscles. She also created a comic strip that depicted a piece of food going through the digestion process.
What Do You Remember Review Questions
Review is built into the lessons if you use the Regular Notebooking Journal. These questions can be completed after all the reading is done or you can assign a few related questions after each reading segment. We tried it both ways depending on our busy schedule. This a wonderful way to check for understanding. They also offer Final Review Questions for an end-of-the-year check-up.
Mini-Books
A variety of mini-books were utilized to record meaningful information such as matchbooks, tuck-in envelopes, layered books, tabbed books, accordion books, fans, cell wheels, shutter books, miniature books, flap books, and shaped pockets. The templates can be found in the Appendix. My daughter loved the skull book and the digestive mouth pocket. She liked feeding the mouth the food. Fascinating facts were written on the backs of the food items. The same miniature books are found in the Junior Notebooking Journal.
Project Page
Alyssa documented the steps for the Edible and Choosy Cell projects from Lesson 1 on the notebooking form below. She recorded what she did and what she learned.
Experiment Pages
Every lesson ends with at least one experiment which utilizes the Scientific Method to document results. The title of the recording sheet is Scientific Speculation Sheet. The author encourages you to complete a few experiments each lesson. Most materials are available in the household. The instructions are clearly stated in the book.
Personal Person Project
This project is found on page 15 of the Regular Notebooking Journal. First, we glued the human body outline template to the page. Then, we printed and cut out a picture of Alyssa's head. Next, each organ or system was taped on top of the human body outline or underneath the head.
Field Trip Sheet
We haven't taken any related field trips yet, but we have future plans to include them and use this form to record the purpose and what we learned.
The Notebooking Journals serve as an excellent record of what your child has accomplished. It is a keepsake for many years to come. It can be shared with family members or reviewed periodically. It can also be utilized as a yearly unit study portfolio.
MP3 Audio CD
The audio CD is in MP3 format. Make sure your computer or device is MP3-compatible before using it. The CD contains numerous tracks. The author, Jeannie Fulbright, narrates the contents of the book for the child to follow along. Almost all of the text is read word-for-word. The author will begin with an Introduction to each lesson and end with the What Do You Remember Questions. The narration prompts are read aloud on the CD as well. The narrator doesn't mention the experiments, notebooking activities, or the Personal Person Project. However, when a Try This! activity pops up she'll encourage the child to read the textbook. For example, Fulbright will say, "You can now do the try This! page 5." The song "Dem Bones" that was mentioned in the book is sung on the audio CD. Soft music and other sound effects are added to the audio CD.
She read the text with a pleasant sounding voice. It wasn't too upbeat or too soothing. She manages to capture and maintain the child's attention. Her passion for the topic is evident as she reads aloud. The pace was appropriate and the CD helps with pronunciation of vocabulary terms. I love that children can see, hear, say, do, and record what they are studying. The complete and full audio recording of the text is read on the CD.

This CD can replace the teacher read aloud session if desired. The author can read the text for mom is she's tired, busy, working, sick, or unable to read that day. It can be used with non-readers, children with disabilities, and auditory learners. Older children who struggle with reading can also utilize the audio recordings. Personally, I love to use the audio as a review after completing a lesson. We listened to the CD before bedtime or while completing chores. You can have your child listen to it while coloring pages or working on notebooking activities. It is a wonderful addition to our elementary Science curriculum.
I do wish the audio recording tracks were labeled with words instead of track numbers, because it would make it easier to use and find the lessons we were working on especially if we have to stop and return to it the next day. The following photo shows you what it looks like when I open the audio CD.
 |
| Click to enlarge. |
Overall Thoughts
We absolutely adore this creation-based curriculum. We are having a blast studying human anatomy and physiology. We are learning and retaining so much information using the methods of narrations, notebooking, hands-on activities, and experimentation. A conglomeration of activities were included making each day fun and exciting. I was thoroughly impressed with the topic coverage. This curriculum exceeded my expectations. I
really appreciate that the suggested lesson plan offers flexible scheduling options. This curriculum implements a multi-sensory, hands-on learning approach.
Possible Vendor Suggestions
- Add a 4-5 Day Scheduling Option
- Audio CD Version for CD Players
- Label Audio CD Tracks with Words
- Create a Coloring Page and/or Vocabulary Activity Book Using the Junior NB Journal Pages to Sell Separately for Regular Notebooking Journal Users
Alyssa's Review
I look forward to Science each day, because I've had a lot of fun studying the human body with the projects, activities, experiments, and crossword puzzles. The review questions helped me remember what I just read and the answers were short. There were also only a few questions to answer. My favorite projects were the Edible Cell, Personal Person Project, and the Digestive Theme Park. My favorite topics to study so far were the Muscular, Digestive, and the Health & Nutrition units.
Results
We are currently finishing up Lesson 5 which is the Health and Nutrition unit. We will slow our pace down for the rest of the year and extend the study with corresponding enrichment activities. I also hope to create tests to cover the key concepts in order to check for understanding.
My daughter retained a lot more information than I ever thought possible. I was thoroughly impressed with this curriculum. I was hesitant to use it at first, because I thought the terminology would be too advanced. But . . . I'm glad I took the leap forward. We've never studied this topic and it is now my daughter's favorite school subject and topic.
Recommendations
We HIGHLY recommend Apologia's homeschool Science curriculum. Exploring Creation with Human Anatomy and Physiology is our favorite course so far. It provides Alyssa with a solid, accurate foundation of human anatomy and physiology. I suggest purchasing all of the components for the course.
Christian homeschooling families should definitely check out this curriculum. Individuals implementing a Charlotte Mason teaching approach will appreciate the use of narration. If your child enjoys lapbooking and notebooking this curriculum has it. Unit study homeschoolers will also find this curriculum appealing. If you want to teach Science using a mastery-based learning approach then this is also the way to go. You'll focus on one topic, anatomy and physiology, all year. Exploring Creation with Anatomy and Physiology is a complete and comprehensive creation-based Science curriculum. Even though it is designed for K-6th grade, I recommend this set for older intermediate aged children in 4th - 6th grade.
Social Media
Facebook Tag: @apologiaworld
Twitter Tag: @apologiaworld
Pinterest Tag: @apologia
Instagram Tag: @apologiaworld
Google+
You Tube
Check out the
Homeschool Review Crew blog to read my colleagues reviews of
Exploring Creation with Human Anatomy and Physiology from
Apologia.